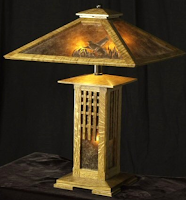
Mission Style Prairie Lamp: Part Five
Part Five: Starting the Build, the Base.
After completing four of the lamps using the Mike White article, I had some thoughts on the build and review of the article contents. The detail on sourcing the lamp hardware and mica are well detailed in the prior entries. More on some of that as part of the assembly detail later. For now, starting to size and cut wood is the next step. No doubt the project falls into three areas: Base, column and shade. The lamp hardware assembly and finishing arguably could be steps four and five. But for now, the project will be addressed on the base, column and shade.
The Base: What a great detail White has included for the base molding. Unless you have a dedicated molding machine, you cannot achieve the detail of the molding in the White article. Even with a molding machine spinning some big and expensive blade, you still will need to have molding miters to align the material to the base. If you are using cherry or walnut, the alignment of the grain and thus the need for the molding may not be needed. If you are using QSWO, then orienting the grain to best represent the QSWO face requires the molding.

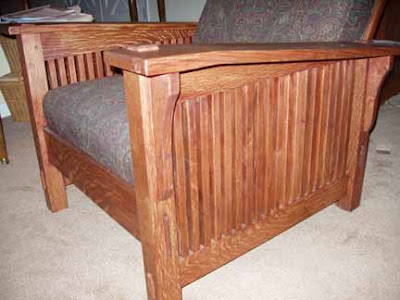
For me, a built up base of QSWO or WO still leaves the edge grain exposed. Built up would imply flat material, with a stacked or built up base. Compare the photo of the base to the left. All QSWO faces showing. Not unlike the quadralinear posts of Stickley Morris chairs to show off the QSWO. Adding in corbels to the base and affixed to the column still produces end grain. Just about any finish will result in the end grain being noticeably darker and just not as attractive. Perhaps personal preference here. BUT, QSWO should show off the grain when possible. And, really, the use of a router on each face of the base with an ogee or chamfer is OK. But, for me, the molding shows off the QSWO and has a great appearance.
Yes the article does call for corbels at the base of the column. They are detail and not from the base up 2/3rds of the column. So the base from the article was a strong reason to select the White construction guidance. I would have never thought of the molding and the article detailed the cuts needed. I am terrible on angles and the molding detail at first did not make sense to me. After four cuts to the molding, I was kind of getting the concept. The built up base for the molding to connect to finally made sense. I used MDF for the molding to mount over. The concept in the White article was to face all the planes with QSWO. As shown, the base molding miters well and the 1/8" veneer cap/top fits well. Some finnicky adjustments and sanding resolved the issues I had with the process.

The base, assembled. Four faces of the base molding all have QSWO aspect showing. A veneer cap to the base in QWSO aspect and even under the enlarged photo detail, the joints hold up to inspection. Here are some closing thoughts on the base construction:
- Cut more base material than you think you will need. There are four angle cuts for the molding. The cuts continue to nibble away at the 3/4" stock. One of the cuts has only 9/32nds against the table and a vertical face against the fence. That is not a lot of support. So, during all that cutting, no matter how careful you are, there is going to be a wobble against the blade leaving a mark or burn to complicate the assembly. So, cutting more provides some room for revision. I hate to say room for error.
- Think Crown molding and the cuts make more sense. The finished molding will have a horizontal and vertical face on the miter saw fence. So does crown molding. Fitting crown molding to the vertical wall and horizontal ceiling is what you will do.
- The base material is two lifts, each 3/4", one at a 45 angle and the other vertical. The back facing planes of the molding will match the faces of the MDF base.
- Dry fit everything. Get it correct. Trim to fit.
- The glue up of the molding is interesting as everything wants to move. The glue up is not like a picture frame as the base is there. Remember, the veneer top goes over the molding so there is some room for fine tuning.
- Clean the glue off the material. For some reason, this project had more post glue-up marks than I can remember. Probably because you are trying to get the CCMs just right. Or, I used Titebond II, waterproof glue and clean up with water was inhibited. I am leaning to the use of TBII. My bad.
Mission Style Prairie Lamp


